Remove Circuit from Hetrix
Standard Operating Procedure
|
Version |
Version 2 |
|
Purpose |
Guide T1 Support in how to remove circuit in Hetrix monitoring so we are updated on the circuits that are still being managed by Hypernetworks. |
|
Task Source |
T1 Manager | Connectivity Delivery Specialist |
|
Owner |
Aprilyn Capunitan — T1 Support Associate |
|
Approver |
John Martinez — T1 Manager |
1. Purpose & Scope
1.1 Non-Technical Overview
The purpose of this procedure is to guide Tier 1 Support Associates in removing existing uptime monitors from HetrixTools when a customer circuit has been disconnected or decommissioned. Removing stale monitors ensures our team is only tracking circuits actively managed by Hypernetworks, keeps our monitoring data accurate, and prevents false alerts on circuits that are no longer in service.
1.2 Technical Scope
This procedure applies to all circuit monitors in HetrixTools that need to be removed due to a circuit disconnection, decommission, or deal closure. It covers locating the correct monitor, deleting the ICMP/Ping probe, clearing the Hetrix monitoring fields in HubSpot CRM deal records, and updating the Hyper Monitoring Status field accordingly — including both the main Hetrix tool and the HGV Hetrix tool for HGV accounts.
|
STEP 1 |
|
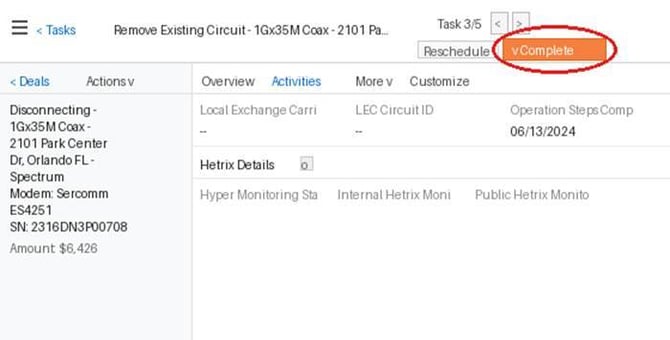
Navigate to HubSpot Tasks In HubSpot, go to CRM > Tasks. If you see a "Remove Existing Circuit" task, click on it to view the details of the deal/circuit that needs to be removed from Hetrix.
|

|
STEP 2 |
||||||||
|
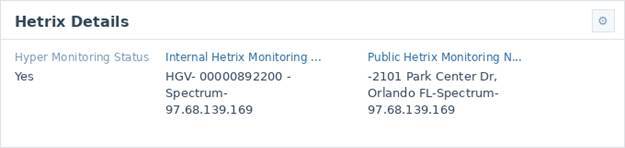
Check Hetrix Details in HubSpot Deals Go to HubSpot > Deals, find the deal, and check the Hetrix Details field. Confirm that monitoring names are listed:
Sample:
|

|
STEP 3 |
|
|
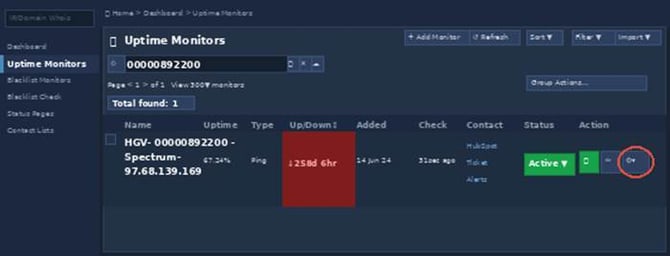
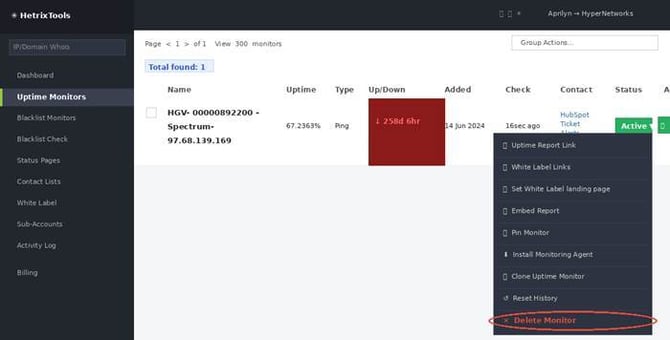
Remove the Circuit in Hetrix Go to Hetrix > Uptime Monitors. Use the Search bar to find the monitor for the deal that needs to be removed (use the monitor name copied from HubSpot). Once located, click the Settings (⚙) icon on the right-hand side of the monitor row.
A dropdown menu will appear. Click Delete Monitor at the bottom of the list.
|
|
STEP 4 |
||||||||||||||
|
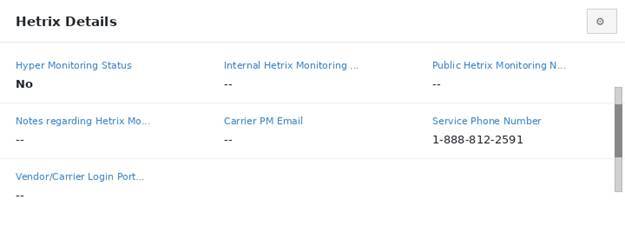
Update HubSpot Deal — Clear Hetrix Fields Go back to the corresponding deal in HubSpot > Deals and update the Hetrix Details section as follows:
Fields should look like this when done:
|