
Update / Change IP in Hetrix
Standard Operating Procedure
|
Version |
Version 1 |
|
Purpose |
Guide T1 Support in how to update or change an IP address in Hetrix monitoring. |
|
Task Source |
T1 Manager | Connectivity Delivery Specialist |
|
Owner |
Aprilyn Capunitan — T1 Support Associate |
|
Approver |
John Martinez — T1 Manager |
1. Purpose & Scope
1.1 Non-Technical Overview
The purpose of this procedure is to guide Tier 1 Support Associates in updating existing uptime monitoring configurations in HetrixTools when a customer circuit's IP address or deal information changes. Keeping monitoring accurate ensures our team continues to detect circuit downtime proactively, maintains correct alert routing, and reflects accurate circuit information in our systems.
1.2 Technical Scope
This procedure applies to all active circuit monitors in HetrixTools that require an IP address update or monitor name change due to a deal change or reassignment. It covers editing ICMP/Ping probe configurations, updating the Hostname/IP Address and Monitor Name fields, syncing changes with HubSpot CRM deal records, and ensuring both the main Hetrix tool and the HGV Hetrix tool are updated for HGV accounts.
|
STEP 1 |
|
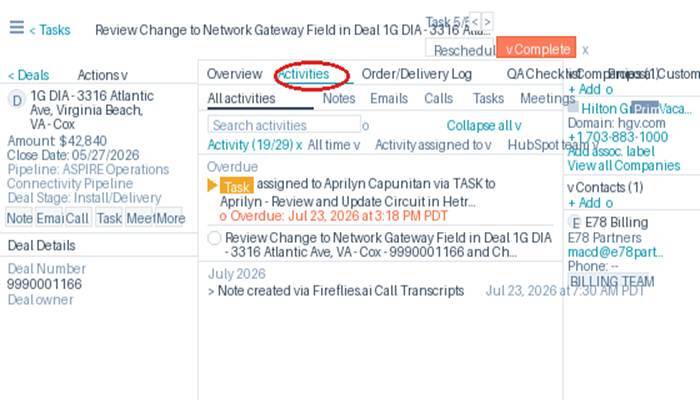
Navigate to HubSpot Deals & Find the Task Once the task is assigned to you, go to HubSpot > Deals and search for the deal number provided in the task. Once you are inside the deal, click the Activities tab. You will see the task listed there — this is your reference for what IP needs to be updated or changed in Hetrix.
|
|
STEP 2 |
||
|
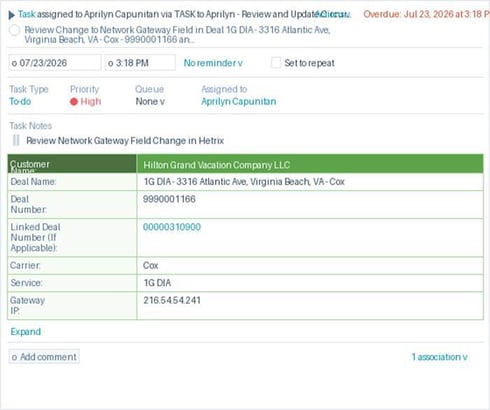
Expand the Task & Check for a Linked Deal Click the ▶ arrow beside the task to expand it. Look for a Linked Deal field in the expanded task details.
|
|
STEP 3 |
|
|
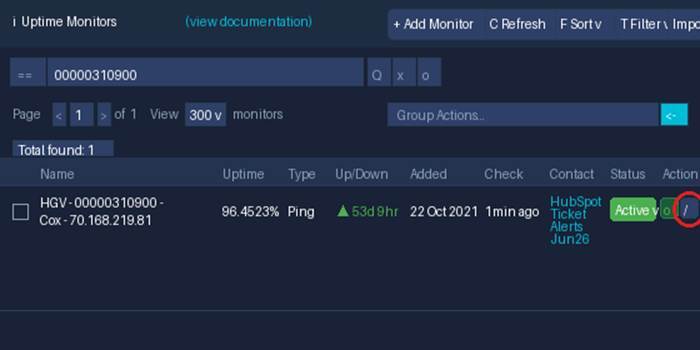
Search the Deal in Hetrix & Click the Edit (Pencil) Icon Go to Hetrix > Uptime Monitors. In the Search bar, enter the Linked Deal number (if one exists). If there is no linked deal, search using the original deal number from your task. Once the monitor appears in the results, click the pencil (edit) icon under the Action column to open the monitor settings.
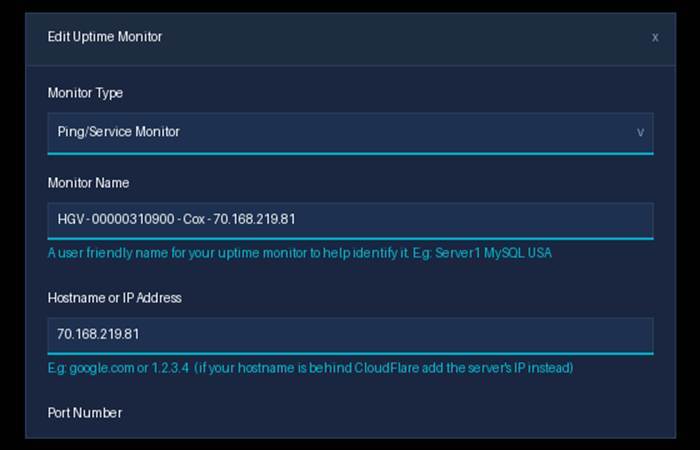
The Edit Uptime Monitor panel will pop up. You can now update the Monitor Name and/or the Hostname or IP Address fields with the new deal number and new IP.
Once done, click the Edit Monitor button at the bottom to save your changes.
|
⚠ Disclaimer:
This Knowledge Base article may be revised at any time. Please ensure you are referencing the most current version.